Attribute Table
In GIS, the attribute table associated to a vector layer is a table that stores tabular informations related to the layer. The columns of the table are called fields and the rows are called records. Each record of the attribute table corresponds to one feature geometry of the layer. This relation allows to find records in the table (informations) by selecting features on the map and viceversa.
In MapStore, accessing the attribute table of a vector layer allows you to edit the tabular data or to directly edit the geometries on the map, to perform spatial queries and filters and to create widgets from the data.
Note
Creating widgets for a layer is accessible from the TOC and the Attribute Table by clicking on this icon  and was already treated in the Widgets section.
- Open a new map.
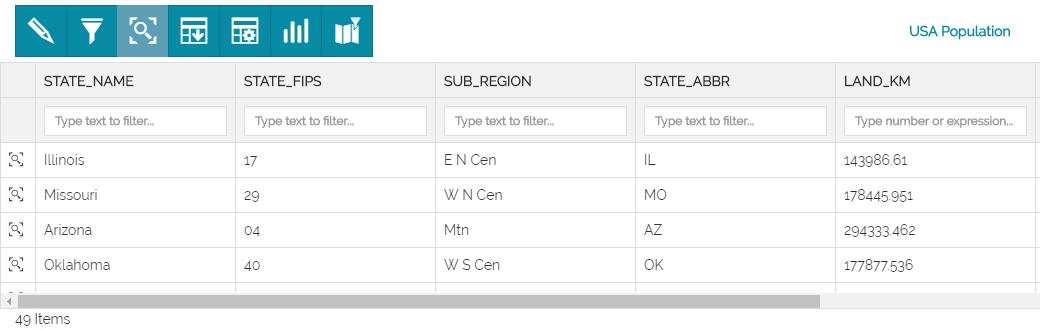
- Add a vector layer (e.g. USA Population).
- Select the layer.
- Click on the Open Attribute Table icon
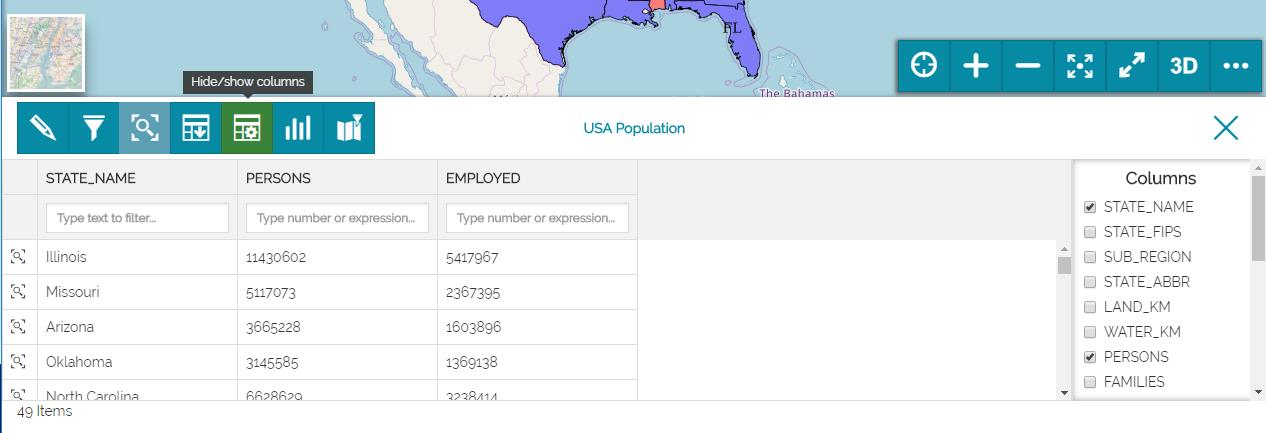
 , you will note that the table has 49 items (rows).
The attribute table will open showing the data table and a set of functionalities.
Editing
The basic Web Feature Service allows querying and retrieval of features. Through Transactional Web Feature Services (WFS-T) MapStore allows creation, deletion, and updating of features.
Warning
By default editing functionalities are available only for MapStore Admin users. Other users can use these tools only if explicitly configured in the plugin configuration (see the APIs documentation for more details). In any case, the user must have editing rights on the layer to edit it (see for example the GeoServer Security Settings).
The Editing tools can be reached from the Attribute Table panel and they allow to edit only the layer which the table refers to.
-
Open the Attribute Table of a layer (e.g '
Lakes, Mountains and Forest')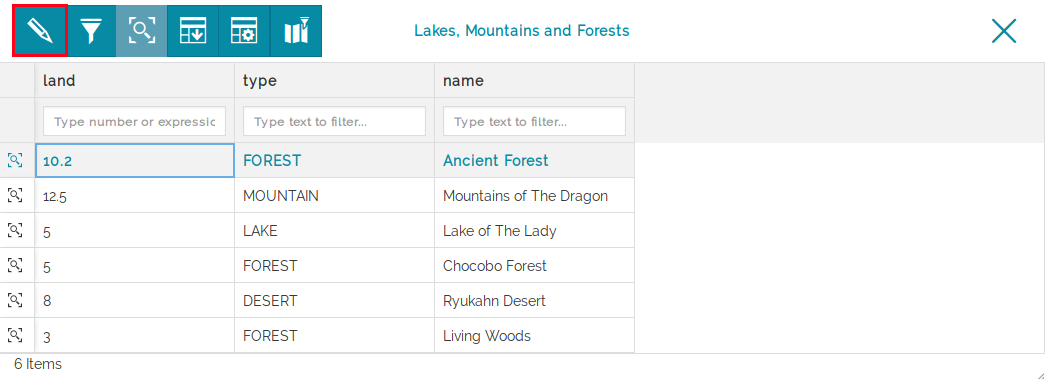
-
Click on the Edit mode icon
 to start an editing session
Note
When the Edit mode is enabled only the editing functionalities are available to the user, all other tools are deactivated.
By default, in Edit mode, you can see a panel like that below:
Through the Quit edit mode button  you can stop the editing session to make the other functionalities available again.
Creation of features
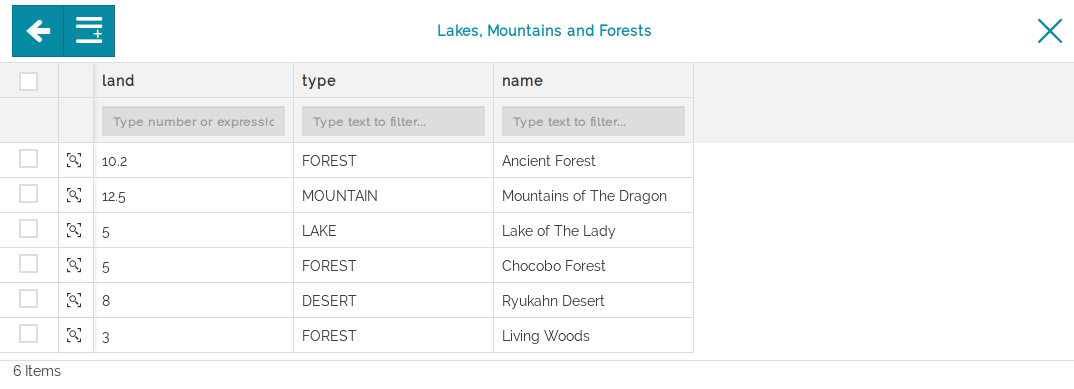
Once the Edit mode is enabled, you can add new features to your layers as described in the following steps:
-
Click on the Add New Feature icon
 to create a new row in the Attribute Table and fill out its fields
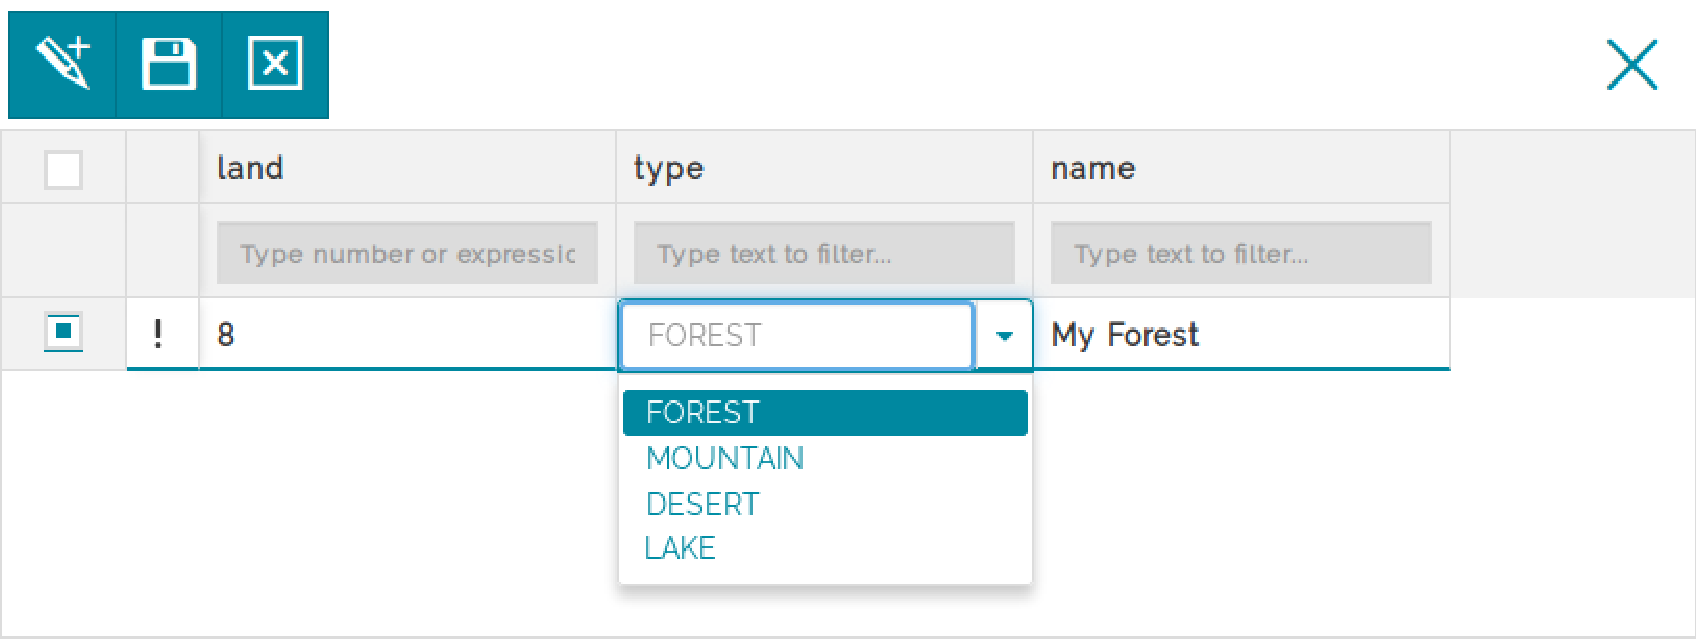
When editing a text field, MapStore provides some suggestion such as the type field above so you can choose the value from a select menu.
The Missing geometry exclamation point in the second column of the Attibute Table means that the feature doesn't have a geometry yet. You can add it later or draw it on the map before saving.
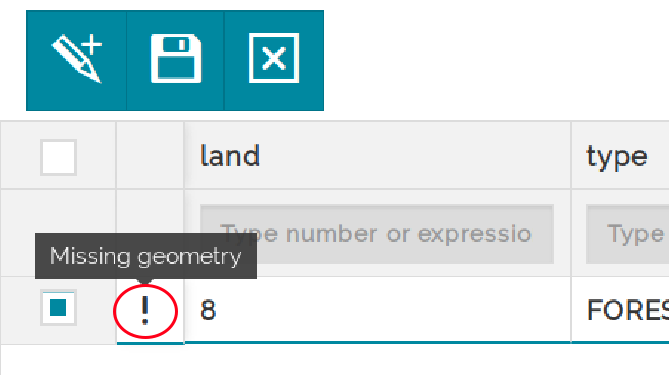
If you want to save the changes made until now, Click on the Save changes icon
 .
.
To undo your changes and exit from the Add New Feature process Click on the Cancel changes icon .
. -
Click on the Add a shape to existing geometry icon
 to draw the shape on the map.
In the case of the '
Lakes, Mountains and Forest' layer we have Polygons and Multipolygons geometries so for each click on the map one new vertex is added to the geometry shape, you should draw at least three vertices for each polygon. You can change the shape dragging vertices in new positions anytime with your mouse.
You can delete the whole shape with the Delete geometry button
 .
.
-
Click on the Save changes button
to commit your changes.
For Lines and Multilines geometries (e.g. 'Roads' layer) the shape drawing function works more or less in the same way. The only difference is that you need at least two vertices to draw a line and not three vertices like for polygons.

For Points geometries (e.g. 'Points of Interest' layer) you can see a marker  on your mouse cursor, a point is drawn down when you click on the map.
Updating of features
If you want to update an existing feature, start an editing session by clicking the Edit mode icon button and follow these steps:
-
Select the feature of interest by clicking the corresponding box in the first column of the Attribute Table
-
If you need to do update the attributes values, type your new data into the input fields
-
If you want to update the geometry shape, you can:
-
move the existing vertices to new positions
-
click on the Add a shape to the existing geometry button
to draw a new shape
-
-
Click on the Save changes button
to commit your changes.
Deletion of features
In Edit mode, you can delete existing features following these steps:
-
Select the features of interest by clicking the corresponding boxes in the first column of the Attribute Table
-
Click on the Delete selected features button
 to trigger the deletion of the selected features
 -
Confirm your choice in the subsequent dialog by clicking on '
Delete' or return back by clicking 'Close'
Advanced Filtering
MapStore allows you to filter and select the data by attribute or by region and to perform cross filtering between two present layers in the map.
- Click on the Advanced Search icon
 .
.
The filtering page will open showing Filters Types.
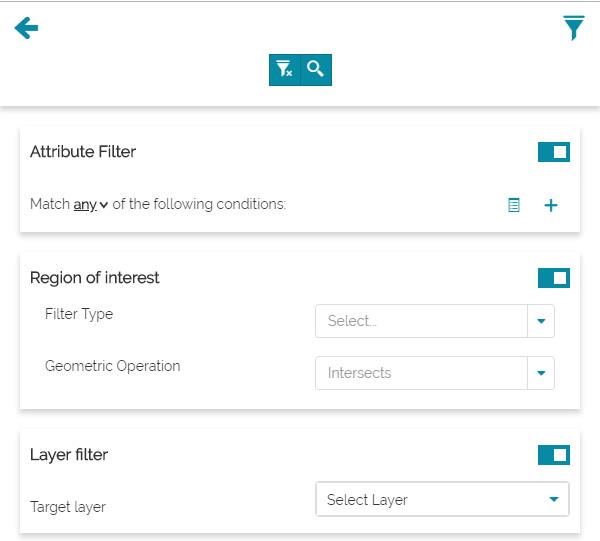
Filtering by Attributes
The Attribute Filter allows you to set conditions on the fields to perform AND/OR logic operations.
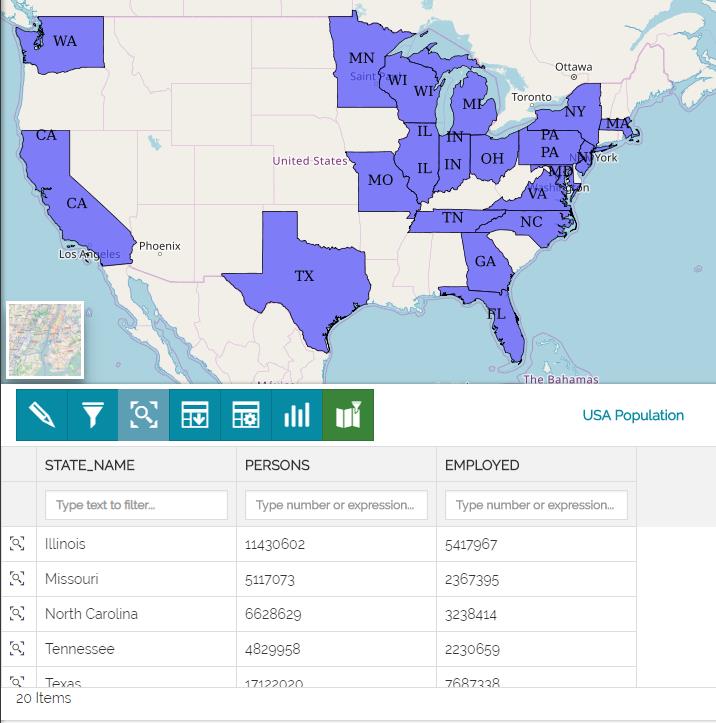
Since the following example is based on filtering the data with respect to the Persons and Employed filelds, let us first switch off the unnecessary fields for a better visualization. To do that:
-
Click on the Hide/Show columns button
 .
. -
Switch off the fields leaving only the STATE_NAME, PERSONS and EMPLOYED.
Now, let us set some filters.
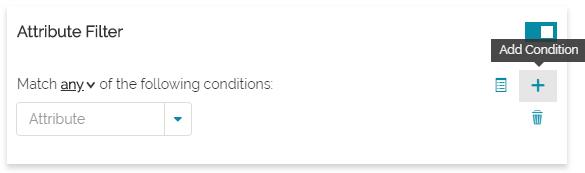
- Click on the
 button to add a condition.
- Set the following condition for example; Persons >= 6 000 000.

- Click on the loop icon to search

The filtered records by persons will be shown in the attribute table.
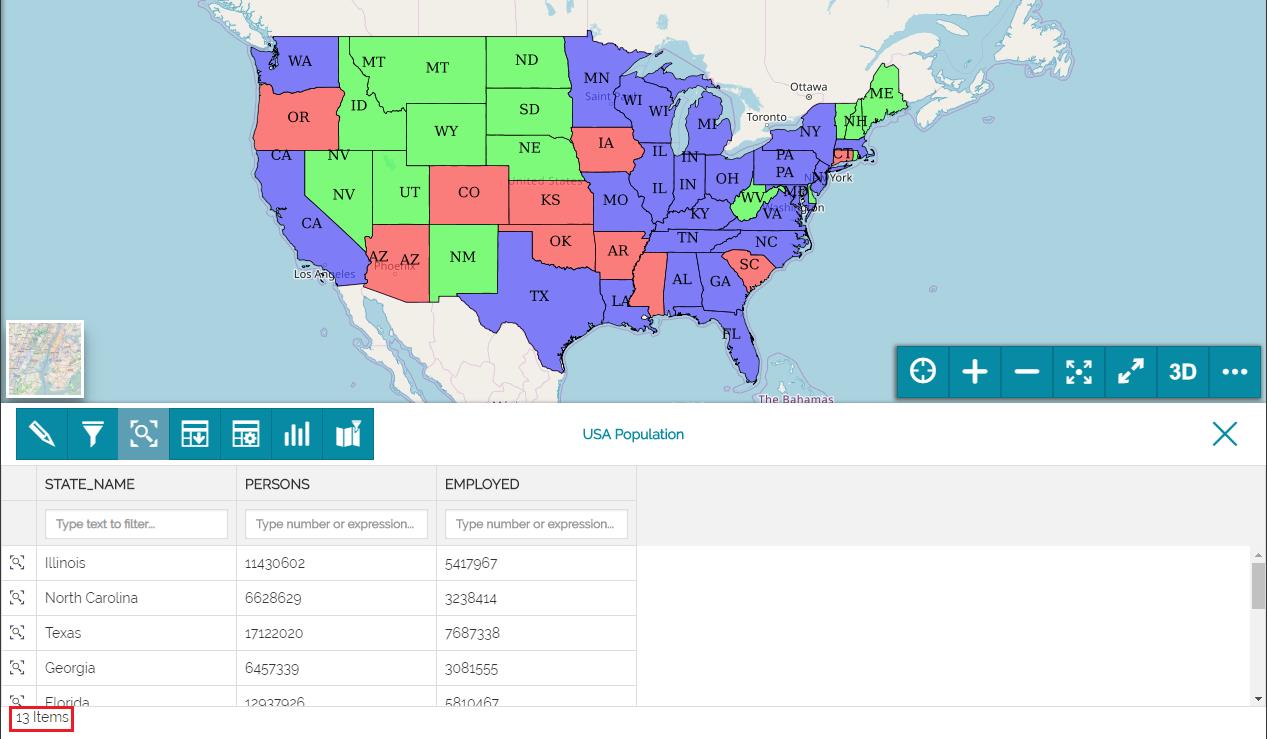
Note
We have got 13 items.
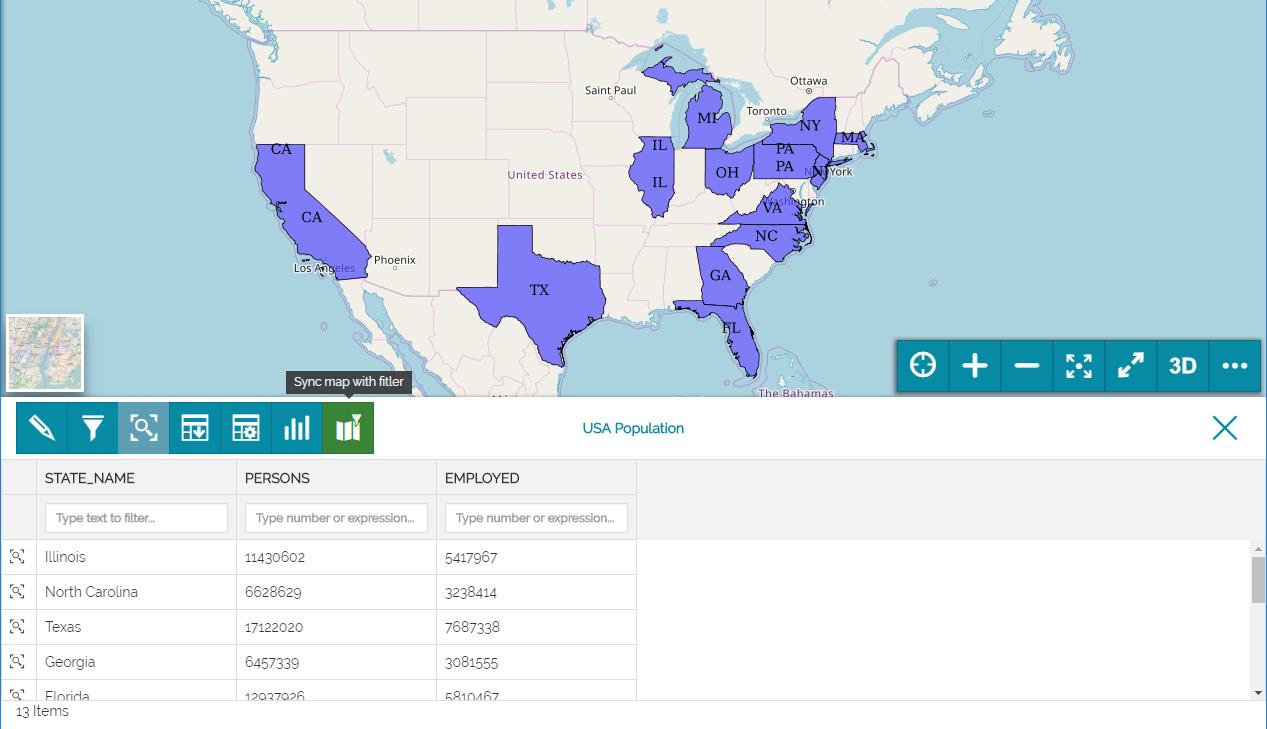
If you want to to see the filtered records also on the map, follow these steps:
- Click on the
 icon to synchronize the map with the filter.
Now let us add other conditions:
-
Click again on the Advanced Search icon
. -
Click on the
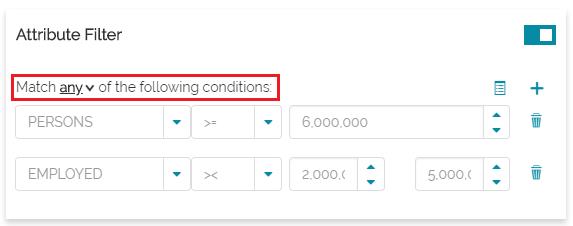
button to add a second condition. -
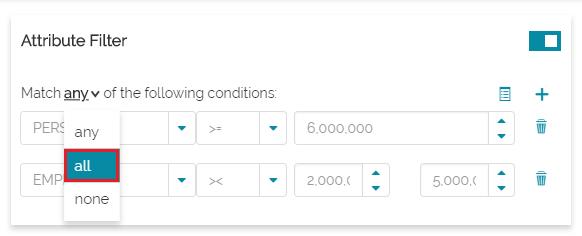
Set the following condition (for example the employed persons between 2M and 5M): Employed >< 2 000 000, 5 000 000.
Note
We are using "Match any of the following conditions" which is an OR logic operator.
- Click on the loop icon to search .
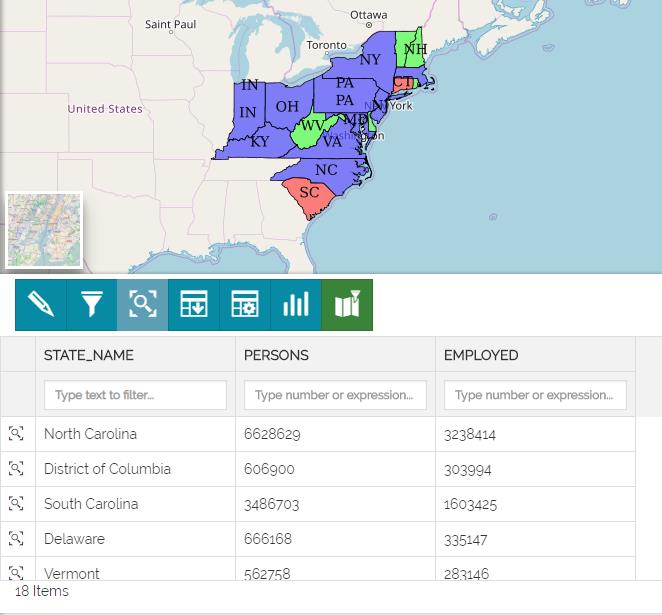
As displayed in the picture below, the filter will return 20 records:
In order to switch to an AND operator you have to follow these steps:
-
Click again on the Advanced Search icon
. -
Select form the droplist all instead of any.
- Click on the loop icon to search .
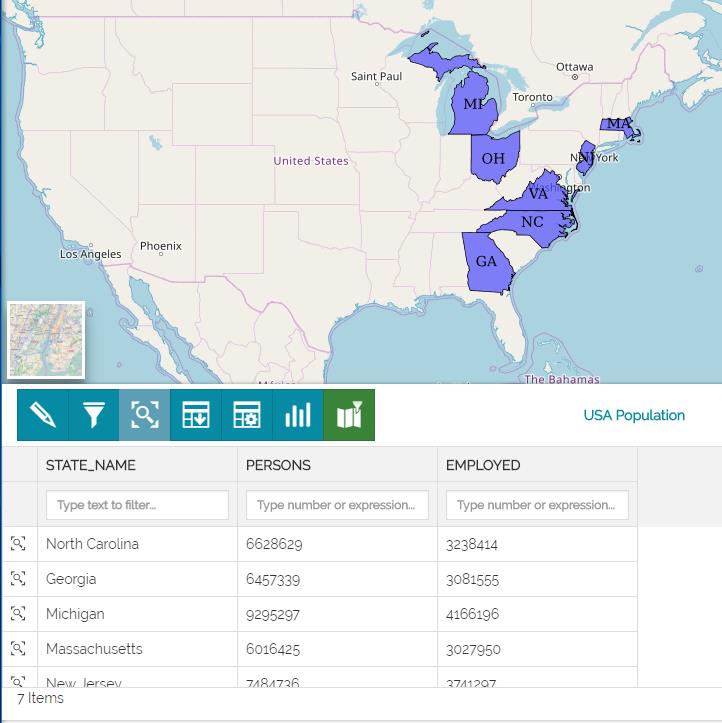
The filter will return 7 records:
Filtering by Location
The second filter type called Region of Interest allows the user to filter the features overlaying drawn geometric shapes on the map.
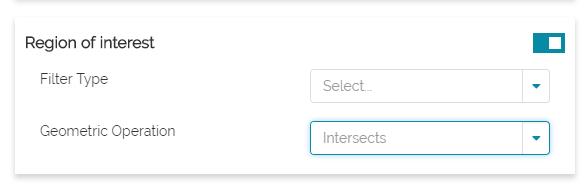
- Select the Filter Type, e.g. Circle.
- Draw the circle on the map; eventually you can change the position of the center and the radius by clicking on the icon
 .
. - Set the Geometric Operation, e.g.Contains.
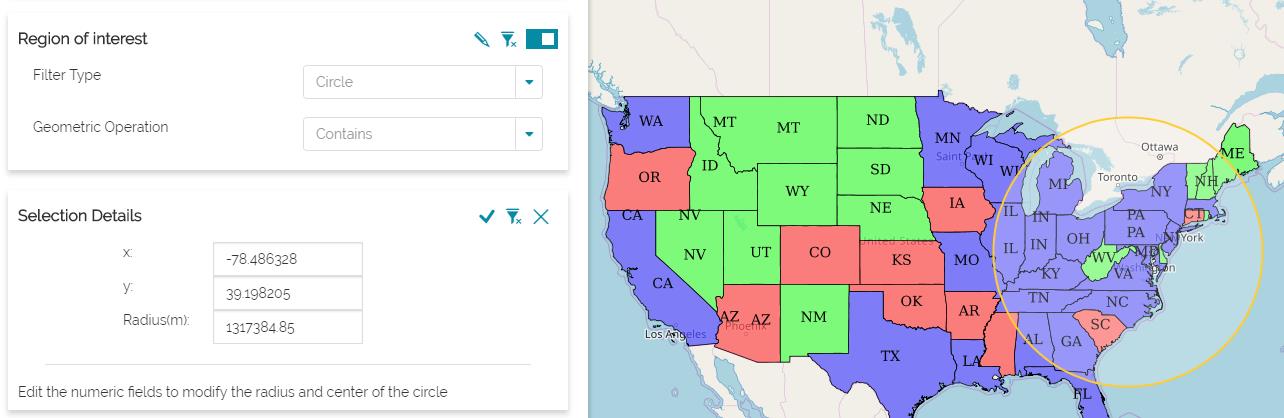
- Click on the loop icon to apply the filter .
Note
The Geometric Operation Contains will extract the features entirely contained in the drawn geometry while the Geometric Operation Intersects will extract the features that have a part intersecting the geometry.
Layer Filtering
Layer Filter allows the user to filter the features of a vector layer with respect to another one. For example, which features of the first layer are contained in the second or intersect the second.
- Open a new map.
- Add a vector layer (e.g. thematism_regioni).
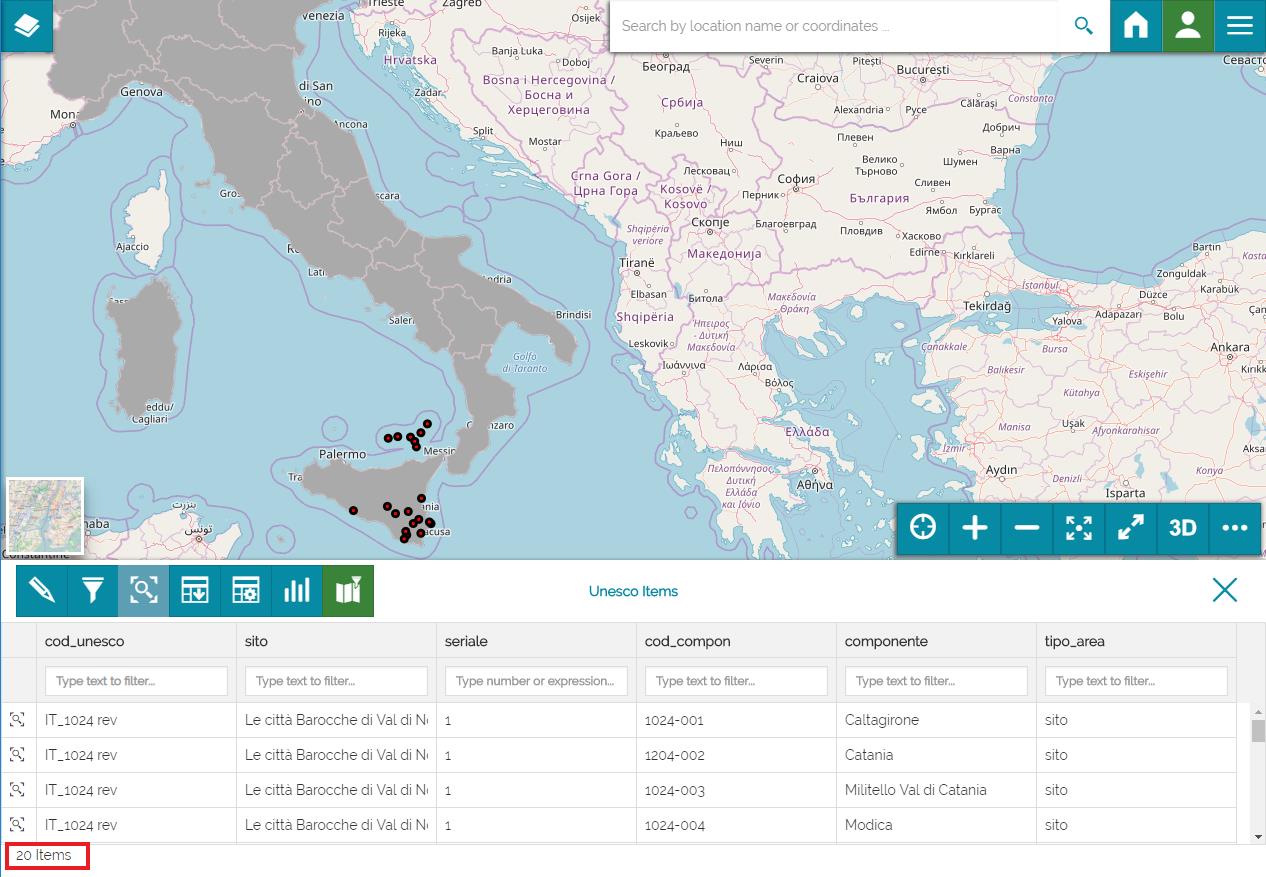
- Add a second vector layer (e.g. Unesco Items)
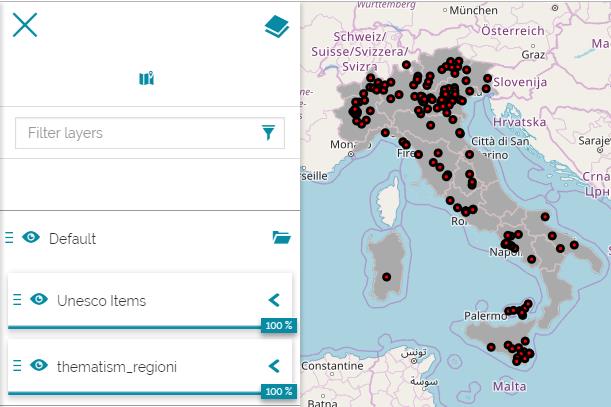
Let us suppose that we want to get all the Unesco sites in Sicily. To do it:
- Select the layer Unseco Items.
- Click on the Open Attribute Table icon .
- Click on the Advanced Search icon .
In the Layer filter section:
- Set the Target layer choosing the layer thematism_regioni from the list.
- Choose the appropriate Operation; in this case Contains.
- Add a condition as the following: cod_reg = 19 since the region code of Sicily is equal to 19.
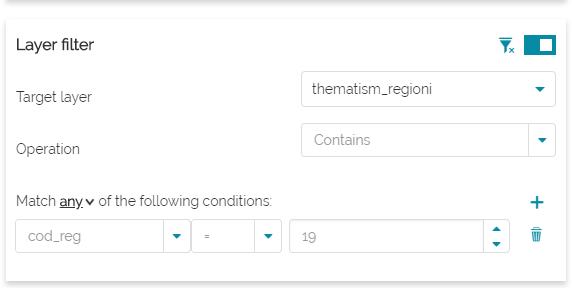
- Click on the loop icon to apply the filter .
Apparently nothing is changed on the map but the filter returned 20 items in the attributes table.
- Click on the icon to synchronize the map with the filter.